
Table of Contents
Ever wished your two-prong outlet could handle modern, three-pronged appliances? Or maybe you’re concerned about the safety of your current outlets. Upgrading these outlets to grounded ones might seem like a complex task, but with a little knowledge and prioritizing safety, it’s a project that many homeowners can tackle themselves.
This guide will take you through the steps of safely grounding an outlet, one by one. We’ll cover the essential tools and materials you’ll need, help you understand your wiring situation, and most importantly, we’ll emphasize safety practices to keep you protected from electrical risks throughout the process. So, grab your screwdriver (but not before turning off the power!), and let’s get your outlets grounded with confidence!
What is a Ground Wire?
Think of a ground wire as a safety outlet for electricity. In normal circumstances, electricity flows through the designated paths in your wiring system to power your appliances. But sometimes, things can go wrong. If there’s a short circuit, for example, electricity might take an unexpected route. This could lead to a shock hazard or even a fire.
That’s where the ground wire comes in. It provides a safe path for any stray electricity to flow directly into the earth, away from your home and anyone inside. This helps prevent shocks and keeps your family protected.
Most homes built today have grounded outlets that include a ground wire. However, in older homes (especially those built before 1970), switches might not be grounded. It’s always a good idea to consult a qualified electrician if you’re unsure about the grounding in your home.
Why Grounding Matters?
Appliances in our homes rely on electricity to function, but it’s important for that electricity to stay contained within the designated circuits. However, unforeseen issues can arise. This is where grounding plays an important role in protecting you and your appliances.
Imagine a scenario where a wire inside your toaster becomes worn or a heating element malfunctions. This could cause electricity to escape its intended path and travel onto the metal casing of the toaster. This creates a potential shock hazard.
Thankfully, if the outlet your toaster is plugged into is properly grounded, there’s a safety mechanism in place. That stray current has a safe escape route. It travels along a dedicated ground wire back to the breaker box in your home’s electrical panel. Once it reaches the breaker box, the excess current triggers the breaker, automatically shutting off power to the faulty appliance. This quick action prevents a potential shock hazard and helps safeguard you and your home.
Understanding Grounded Outlets
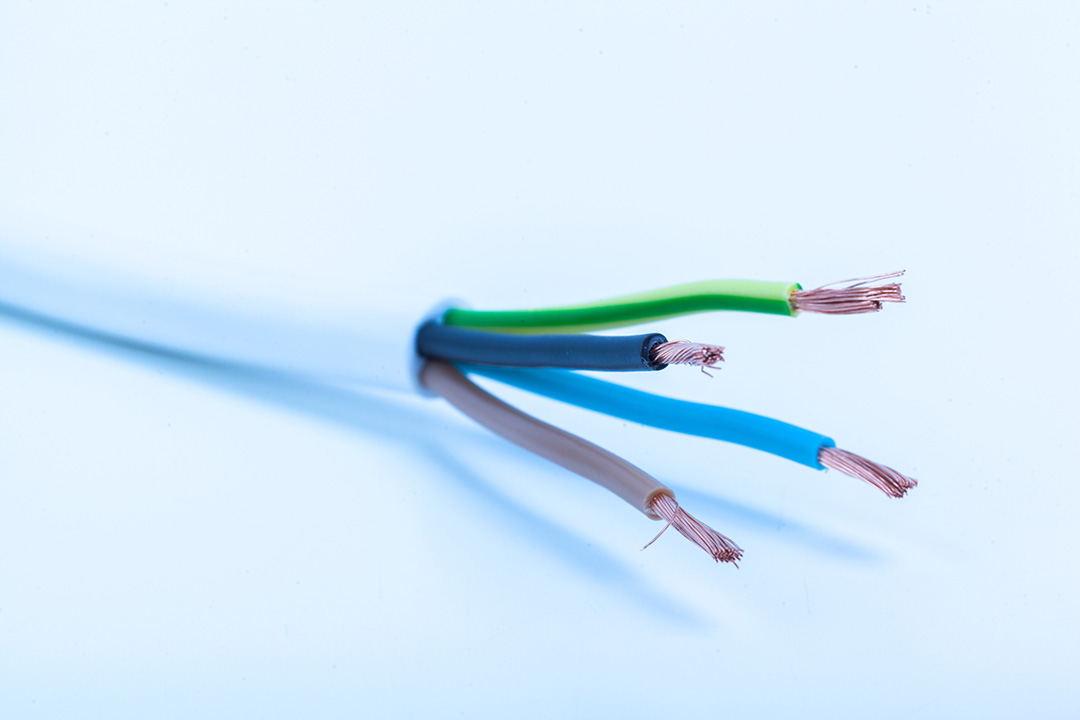
Most electrical outlets today have three prongs. Here’s what they do:
- Hot wire (usually black or red): This carries electricity to your appliance.
- Neutral wire (white): This carries electricity back from your appliance.
- Ground wire (bare copper or green): This provides a safety path for electricity if there’s a problem inside an appliance.
Homes built before the 1960s might have outlets with only two prongs. These outlets still work, but they lack the extra safety feature of a ground wire.
Two-Prong vs. Three-Prong Outlets
- Two-Prong Outlets (Ungrounded): These older outlets don’t have a ground prong or wire. If a problem happens inside an appliance plugged into one, there’s no safe path for extra electricity. This could cause the appliance itself to become electrified, which could lead to a shock if touched.
- Three-Prong Outlets (Grounded): These are the standard in most modern homes. They have all three prongs (hot, neutral, and ground) which creates a safer circuit and provides a way for excess electricity to escape in case of an issue.
Initial Preparation for Grounding a Wire
1. Make Sure If it’s the Right Job for You
Grounding wires can involve serious electrical work. It’s strongly recommended to consult a qualified electrician if you’re not comfortable with electrical tasks. Their expertise ensures the job is done safely and correctly.
In some areas, local building codes might require a licensed electrician to ground older wires. Check with your local building department to see if this applies to your situation.
2. Check for Permits
Even for seemingly simple electrical tasks, it’s important to verify if you need approval or a permit from your local building department or ordinance office. Skipping this step could lead to fines or other issues.
Obtaining a permit can also provide valuable information, such as specific guidelines for installing new outlets. Following these guidelines helps ensure your project is completed safely and avoids potential penalties.
3. Gather Your Materials
Once your permits are ready, you can start shopping for your materials. These electrical materials usually include:
- Screwdriver (flathead and Phillips)
- Wire stripper
- Grounding wire (bare copper or green insulated)
- Grounding screw or green grounding clip
- Voltage tester or multimeter
How to Ground an Outlet?
1. Turn off the Power
- Locate your main electrical box. This is typically a metal panel located in your basement, garage, or utility closet.
- You have two options:
- Turn off the circuit breaker: Identify the breaker that controls the outlet(s) you want to ground. Flip the breaker switch to the “Off” position.
- Turn off the main switch: If you’re unsure which breaker controls the outlet, you can turn off the main switch to shut off power to your entire house.
Once that’s done it’s important to double check the power before moving to the next step.
- If you turned off a specific breaker, use a circuit tester on the outlet to confirm it’s truly off power. This ensures you’ve identified the correct breaker.
- Some circuit identifier tools can help verify if the circuit is off. When the power is off, the tool plugged into the outlet will stop signaling.
- Unless you’re already familiar with the wiring (which you’ll be able to confirm once you open the outlet box), it’s important to test both outlets in a duplex configuration to ensure they’re not receiving power.
2. Take Out the Receptacle
The next step involves removing the receptacle itself. Begin by unscrewing the mounting screws, typically located at the top and bottom of the receptacle. If the box is flush with the wall surface, you might need to carefully cut through any paint or plaster to create space to pry the receptacle loose. Once the screws are removed, gently pull the receptacle out of the box as far as the wires allow. Look for a green grounding screw near the bottom of the receptacle.
Now, identify your grounding wire, if it’s present. It’s often a bare copper wire, but it could also be in a green color if it’s from a pre-assembled device. In some cases, a metal box itself might be grounded through a conduit or metal-sheathed cable.
3. Examine the Wiring System and Receptacle
There are two main scenarios when grounding an outlet. If your outlet box has three wires (black, white, and bare copper), the grounding wire might already be attached. Check the connection and tighten it if needed.
If your box only has two wires (black and white) and a two-prong outlet, you can consider installing a GFCI (Ground Fault Circuit Interrupter) outlet instead of grounding the existing one. GFCIs provide added protection against electrical faults but won’t necessarily improve grounding for sensitive electronics. It’s important to note that GFCI outlets labeled “no equipment ground” won’t offer true grounding.
In older homes with only two-wire configurations, the box itself might not be grounded. Upgrading the entire cable to include a grounding wire (black, white, and ground) is the safest option for proper grounding. This will also help reduce radio frequency noise.
If you do have a bare copper or green grounding wire in the box, it’s important to verify if it’s actually grounded. You can use an ohmmeter to test the resistance between the wire and the metal outlet box. Little to no resistance indicates a grounded connection.
Metal conduits and certain metal-sheathed cables can also act as grounding paths, but they need to be properly installed and connected to a designated grounding point.
Finally, if you encounter ancient wiring with black cloth covering rubber-coated conductors, it’s best to leave it untouched and call a qualified electrician for replacement. Moving such wiring can damage the insulation and create a safety hazard.
4. Secure the Ground Wire
There are situations where the grounding wire might already be wrapped around the cable as it enters the electrical box. In this case, instead of connecting each device’s ground wire individually, we can create a “pigtail.” This involves twisting all the device ground wires together securely. From this combined ground wire, one connection should be made to the metal box itself using the grounding screw. The remaining length of the pigtail will then be used to connect the new outlet’s ground terminal.
5. Try Installing a New Receptacle if Needed
If your electrical box doesn’t have a grounding conductor and you need a proper ground for your outlet, you’ll need to install new wiring according to electrical codes. However, if you’re replacing a two-prong outlet with a three-prong GFCI outlet, grounding the new outlet might not always be necessary for the GFCI to function.
GFCI outlets offer protection and can control additional outlets, even if they don’t have a ground wire. You can use the existing cable and wires that connect to other outlets further down the circuit (protected by the GFCI) for this purpose. As long as these additional outlets are properly connected as the “load” on the first GFCI, a single GFCI outlet can safeguard them all.
GFCI outlets typically have two main terminals: hot and neutral. These are the ones you’ll use for connection. The ground terminal on the GFCI itself isn’t actually used, but if it’s not connected to a grounding conductor, any protected outlets downstream must be labeled “No equipment ground.”
6. Connect the Grounding Terminal with the Grounding Wires
Once you’ve accessed the outlet’s wiring, focus on the grounding component. If the grounding wire appears loose or disconnected, there are a few steps to take.
First, use needle-nose pliers to create a loop at the end of the bare copper grounding wire. This loop will help secure the wire to the green terminal screw on the outlet. Place the loop around the screw, then tighten it with a Phillips head or flathead screwdriver. Make sure the loop tightens with the screw and is not pushed off from the terminal.
It’s also helpful to double-check the connections of the other wires while you have the outlet box open. The black wire should be securely attached to the brass terminal marked “Hot,” and the white wire should be connected to the silver terminal labeled “Neutral.” On a grounded outlet, the larger slot is typically neutral (white wire) and the smaller slot is hot (black wire).
Finally, take a moment to visually inspect any other connections within the outlet box. Make sure all the wire nuts are snug, holding the wires securely and tucked neatly out of the way. Additionally, confirm that any clips or screws within the box are tightened properly.
7. Secure the Receptacle
Once you’ve made the final connection, it’s time to secure the receptacle back into the electrical box. Wrap the receptacle with electrical tape, ensuring the terminals are completely covered. Carefully push the receptacle back into the box, making sure to fold the wires neatly. Double-check that the bare copper grounding wire isn’t touching the “hot” terminals, which are typically black or red. Finally, tighten the mounting screws to secure the receptacle in place. Replace the cover plate and screw it on firmly, but avoid overtightening to prevent cracking the plastic.
8. Turn the Power On
After you’ve completed the steps to ground your outlet, it’s important to double-check everything is working properly. Turn the power back on at the breaker box. Use your circuit tester again to confirm the outlet is now grounded correctly. If you’ve installed a GFCI outlet, press the reset button to ensure it functions properly. Plug in a lamp or other appliance, turn it on, then press the test button on the outlet. This should shut off the appliance. Finally, press the reset button again to turn the appliance back on. This simulates a ground fault scenario and verifies the GFCI’s ability to trip.
If you have successfully grounded the outlet, some external testers with a built-in GFCI test button can also be used to confirm GFCI operation. It’s important to note that most basic testers (three-prong plug with a test button) won’t trip an ungrounded GFCI. However, the internal test circuit within the GFCI outlet can still verify basic functionality even without a ground connection. In situations where the outlet isn’t grounded, a more advanced tester with its own grounding wire would be a better choice for a complete test.
Safety Reminders and When to Call an Electrician
Electrical work can be tricky. If you’re unsure about something, it’s always best to call a qualified electrician. Here are some situations where it’s a good idea to get professional help:
- Lights flickering or dimming frequently
- Breakers tripping often
- Sparks coming from outlets
- A burning smell near outlets
Closing Thoughts
Grounding your outlets is an important step to ensure the safety and functionality of your electrical system. By following the proper procedures and prioritizing safety throughout the process, you can upgrade your outlets and enjoy the peace of mind that comes with proper grounding.
However, it’s important to remember that electrical work can be risky. If you’re not comfortable with any of the steps involved, or if you encounter any unexpected issues, don’t hesitate to call a qualified electrician. Their expertise can help ensure the job is done safely and correctly, giving you confidence that your home’s electrical system is up to code and ready to handle your modern appliances.
Ready to make your home safer? D&F Liquidators has all the electrical supplies you need for grounding projects, from grounding wires to outlets.
Get in Touch


